Your First Step to Automated Bookkeeping
Welcome to BMCA and the start of your accounting journey with us! We're thrilled to have you on board and are here to guide you through the simple process of activating your user account. By following these easy steps, you'll be all set to explore the many features of our accounting portal.
Step 1: Find Your Invitation
First things first, let's locate your invitation:
- Head over to the email inbox where you were expecting our invitation.
- Look for an email from no-reply@firm.ai containing your portal invitation.

Step 2: Activate Your Account
Now, let's get your account up and running:
- Within the email, you’ll see an “Activate My Account” button. Give that a click, and it will open up the portal in your web browser.
Step 3: Enter Your Details
Time to make your account uniquely yours:
- On the portal login screen, you’ll see a few fields to fill in:
- Password: Create a unique password here.
- Confirm Password: Type in that unique password once more for verification.
- First Name & Last Name: Let us know how you’d like to be addressed in our system.
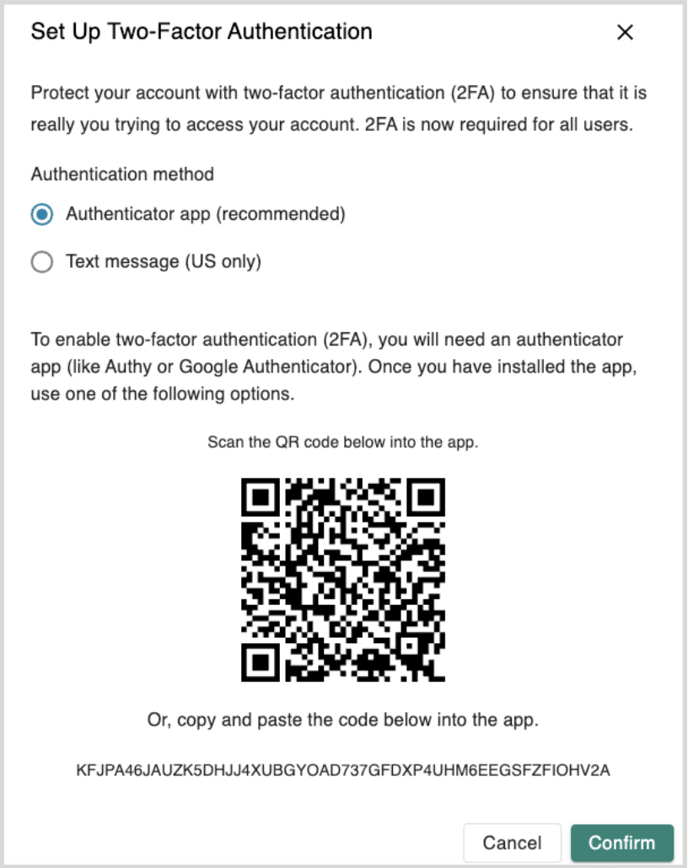
Step 4: Set Up Two-Factor Authentication
For added security, let's set up two-factor authentication:
- Click the “Set Up Two-Factor Authentication” button.

- You’ll have two options:
- Authenticator App (Recommended): Use an app on your smartphone to generate login codes.
- Text Message (US Only): Receive codes via SMS.

If you choose Authenticator App:
- Make sure you have an authenticator app installed on your phone. If not, download one from your app store.
- Use the app's instructions to link it with your portal account.
- Once set up, hit the "Confirm" button.
If you choose Text Message:
- Enter the phone number where you’d like to receive the authentication codes.
- Click “Confirm” to finalize the setup.
Step 5: Ready to Go!
Once you’ve successfully set up your authentication method and clicked confirm, you’re all set! You can now log into your portal and start exploring the tools and features we offer to streamline your accounting tasks.
Welcome aboard, and we're here to assist you every step of the way!
